Stone Restoration and Maintenance Corner: Finishing Stone from the Quarry
Bob Murrell
M3 Technologies
Photos by Bob Murrell
When slab or tile stone is quarried and worked, it is generally worked from coarse to fine for the desired level of finish. It sounds fairly procedural but there are many issues that must be dealt with, especially with regards to “in the field” work.
Most stone is quarried using diamond wire saws, diamond chain saws, explosives, or splitting type machines (and even by hand with wedges). Once the stone is in block form, it is then cut using diamond slab saws or split (in the case of slate and other similar stones). What used to take days now takes a few hours.
When the stone is in its final dimension (slab or tile), then the finishing process begins. Coarse grits are used to smooth out the diamond saw marks left behind from the previous process. These can be silicon carbide or diamond, depending on the stone being worked and machine being used.
Multiple-head automatic line finishing machines or radial arm machines are typically used to finish both slab and tile material. The automatic line machines will use metal bond diamonds to rectify or gauge the material first. Once the material is within the specified thickness tolerance, the next heads will begin to grind and hone and ultimately polish the material, if that is the desired finish. If a honed finish is desired, the process will stop at that predetermined level of sheen and color. Honed materials are becoming more and more popular. I personally like a hone to be at about a 200 grit to 400 grit finish, depending on the material. When we hone in the field, it is somewhat subjective and can be customized to the client’s preference.
So, when we are honing, we are actually smoothing the material with finer and finer scratches. When moving from a 60 grit scratch to a 120 grit scratch, we must essentially replace the 60 grit scratch with the 120 grit pattern, and consistency is the key to success. Remember, we are replacing the previous scratch pattern with the new scratch pattern.
 |
|
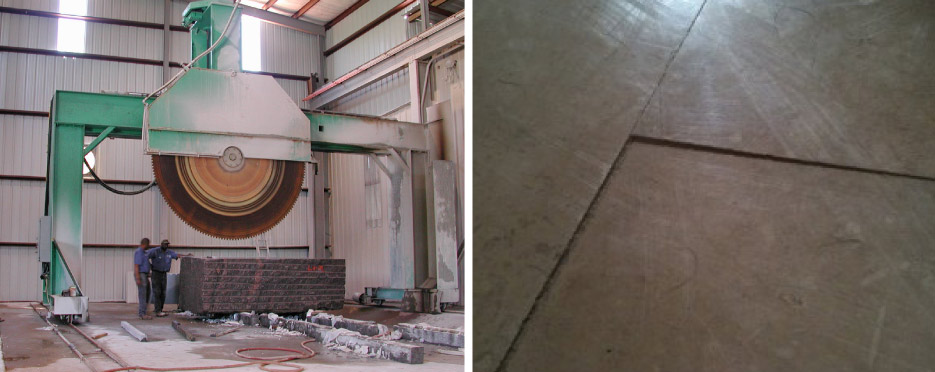
Above, Left: This large block saw does in hours what used to take days of patient effort.
Above, Right: Lippage is just one of the many installation variables that processing plants don’t have to consider. |
As I’ve said in past articles, I consider grinding to be 120 grit and below, honing is anything over 120 grit to about an 800 grit, and polishing begins above 800 grit. These are my opinions, but you are welcome to adopt them.
When we carry out the smoothing process, and as we go higher in the grit scheme, the scratch level gets finer and finer, and therefore also reduces the surface area. This takes us from the stage of diffusion (ambient light being scattered) to the beginning stages of reflection (light being directed back to the eye). We can quantify the amount of light reflection with the use of a gloss meter. However, it is the eye that must ultimately be appeased. Most honed projects will give some light reflection on an oblique angle (looking across the surface), but not on a perpendicular angle (looking straight down).
Implementing the above processes in the field is the Restoration & Maintenance Contractor’s specialty. We have it a little different than the processing plants. They have more highly technical equipment in many cases, but we have a different environment entirely, which they don’t have to consider. We have walls with baseboards, grout lines, lippage and vertical surfaces, not to mention the furniture issue and adjacent sensitive surfaces. Most every process we conduct will require at least one person, whereas the processing plant has some automation in most finishing processes, nowadays. We have to use caution with water usage and capture the waste, where the factory can use copious amounts and even filter, then recycle it.
Has anyone ever had to move a client’s furniture to access areas of the project? I bet you have, even though we try to avoid this and have it done before we arrive (if nothing else, for liabilities sake). However, this issue inevitably comes up now and then.
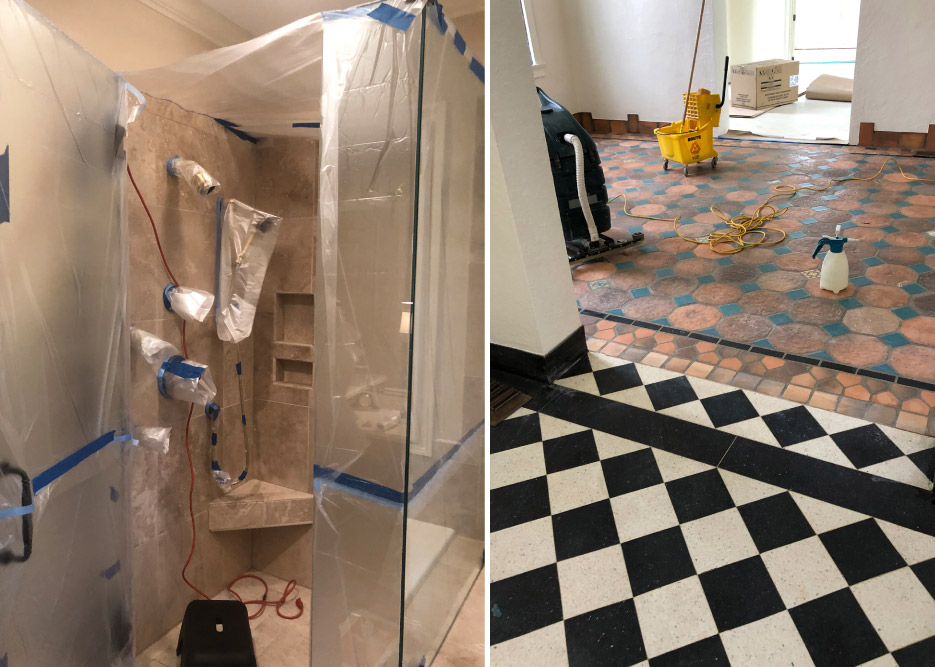
How much time do we spend on prep work, taping and draping off adjacent sensitive areas? Doing it right can take up a good portion of a morning’s work. And, it may have to be done several times, depending the number of days the project area will take. Water and slurry can penetrate even the best prepped areas and must be replaced (sometimes daily) as water can be held under tape and plastic, which can cause damage on certain surfaces. So, in major projects where large amounts of water must be used, like in lippage removal, for example, the tape becomes saturated and must be replaced frequently.
 |
|
Above, Left: That’s a wrap! This protective masking took an experienced technician well over an hour — time well spent. Be aware that water and slurry can penetrate even the best prepped areas, and you’ll need to change wraps and masking with each day’s work.
Above, Right: The challenge in this job was moving from polished terrazzo in one room to decorative tiles in the next. Restoration Pros must deal with many stone, ceramic, and masonry surfaces. |
To summarize, let’s take a look at the shaping and smoothing process descriptions:
- Grinding — heavy stock removal such as lippage removal, shaping, coatings removal – typically requires larger amounts of water usage (except for some coatings removal processes) –> 6 grit through 120 grit.
- Honing — smoothing, through to a finer surface scratch pattern – the higher the grit, the more light reflection and color increases –> 120 grit through about 800 grit.
- Polishing — smoothing to highlight reflectivity –> 800 grit to final polish procedure.
To sum this all up, as Restoration and Maintenance Professionals, we replicate in the field what the processing and fabricating plants do in the shop.
We have to go above and beyond the grinding, honing, and polishing processes by tiptoeing around expensive furniture, and protecting sensitive decorative adjacent surfaces. They are in a shop environment while we do the work in a million dollar home. Not to mention that we must have knowledge and experience on many different type of stone and masonry surfaces. But hey, that’s why you get the big bucks, right? LOL!
As always, I recommend submitting a test area to confirm both the results and the procedure prior to starting a stone or hard surface restoration or maintenance project. Also, the best way to help ensure success is by partnering with a good distributor, like BB Industries, that knows the business. They can help with technical support, product purchase decisions, logistics, and other pertinent project information.
Enjoy being with your family and living life to the fullest!
Bob Murrell has worked in the natural stone industry for over 40 years and is well known for his expertise in natural stone, tile and decorative concrete restoration and maintenance. He helped develop some of the main products and processes which revolutionized the industry, and is currently the Director of Operations for M3 Technologies.