How Do You Handle Backsplash Seams?
 |
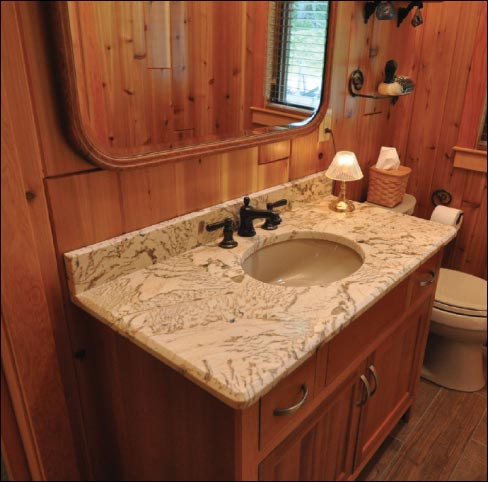
| Above: Backsplash and countertop seam placement actually begins at the time of pricing. For example: your customer agrees on a price for using the perfect (remnant) slab for their marble vanity. When the material is limited, chances are greater there may have to be a seam in the splash. Take a deep breath and explain the options to them. Photo by Zack Smyser |
 |
|
Above: In the case of fragile, exotic stones like honey onyx or marble, even a short backsplash like a vanity may need to be rodded. And, for a double sink vanity, you may also need a carefully placed seam. Photo Courtesy Shahn Ellis |
 |
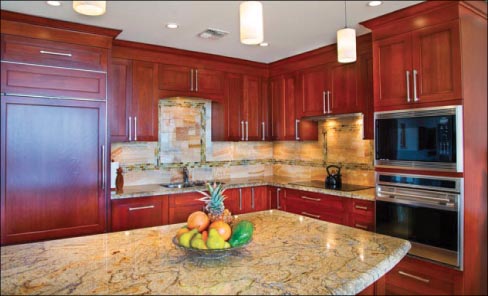
| Above: Larger kitchens requiring more square feet of slabs offer significantly more latitude to fabricate the backsplash, especially when the movement or flow from seam to countertop is a consideration. Says Jim Doran, “The majority of the stones we carry have a lot of movement in them, and we don’t want to have a big white vein coming down the wall and meet up with a dark area in the countertop. So we’ll work with (the customer) in terms of making sure the colors flow.” |
 |
| Above, Jim Doran: “It’s not always possible to run the splash or countertop continuously, because using the slabs efficiently – sometimes that’s just not possible. So we’ll continue to work with (the customer) to make them understand what we need to do. Everyone loves beautiful countertops, but when you walk into the room, it’s the backsplash you see first. We want to showcase the ‘Bling Factor,’ if you will, on as much of the vertical space as we can, blending them as best as possible with the horizontal surfaces.” |
 |
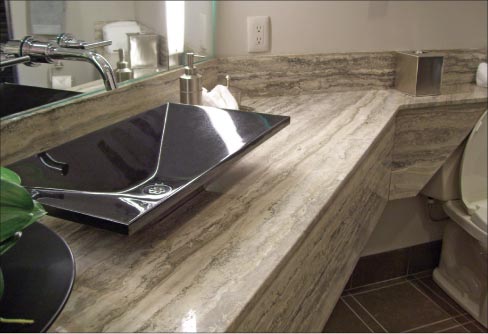
| Above: Seams are inevitable when your layout includes matching up a running backsplash around an angled surface, like this Silver Travertine vanity. The challenge then is making a smooth seam and matching the flow of the grain – and educating the customer on the options. |
 |
| Above, Kelly Milligan: As far as the number of seams, we are not as concerned about that as we are about the length of each backsplash. If it’s engineered stone, then we can make it 70 or 80 inches long. But if it’s granite, specifically one of the more exotic granites, then we’ll start to shorten the length within reason. Photo by Zach Smyser |
By Peter J. Marcucci
The Slippery Rock interviews three shop owners in different markets to get a perspective on best practices for explaining backsplash seams to customers.
Backsplash seams: Can’t live with ’em, can’t live without ’em. Ask any designer, on any given day: “How many backsplash seams will your client accept?” and the short answer will always be, “As few as possible!” But when building with materials that vary in size and strength, installing a running, regular-height backsplash with as few seams as possible can be a real challenge, leaving you, the designer, sales person or cutter at odds about what is possible, and what is best. As you might have suspected, the subject of best practices for seams is mostly subjective.
Most clients don’t take time from their busy day to attend a layout session with seam lengths on their mind. For them, layout day is more about loving their choice of material, establishing focal points and matching seams in their dream kitchen.
Experienced sales staff, designers and longtime cutters have an acquired sense for a client’s needs before they arrive. But just in case you don’t, the Slippery Rock sought out the wisdom and expertise of 3 handpicked shops, asking them one simple question: What is your strategy for explaining seam placement, specifically backsplashes, to your clients? Some of the answers might surprise you.
Participants in this roundtable were Jim Doran, Ceramic Tile Plus & EY Design, Maui, Hawaii; Kelly Milligan, Knoxville’s Stone Interiors, Knoxville, Tennessee; and Julie Hoffmeyer, Mammoth Granite, Escanaba, Michigan.
Jim Doran: Most of the time, what’s important to the client is the final look and, during layout, most are concerned with the placement of their countertops. Then, after we start playing with the templates on the slabs, they want the backsplashes to flow. The majority of the stones we carry have a lot of movement in them, and we don’t want to have a big white vein coming down the wall and meet up with a dark area in the countertop. So we’ll work with them in terms of making sure the colors flow.
That said, it’s not always possible to run the splash or countertop continuously, because using the slabs efficiently, sometimes that’s just not possible. So we’ll continue to work with them to make them understand what we need to do. Everyone loves beautiful countertops, but when you walk into the room, it’s the backsplash you see first. We want to showcase the “Bling Factor,” if you will, on as much of the vertical space as we can, blending them as best as possible with the horizontal surfaces.
There is an educational component, as you know as well. People will want to move and turn the templates in different directions. We’ll then explain that there is a certain direction to follow, and if we turn it that way, it will disturb the flow of the stone. We don’t do installations like that, so teaching them how to lay things out while paying attention to the stone is important.
On some of our more solid colors, when going seam to seam, you don’t notice a difference, and many are very simple to work with. But when we use stones that are more exotic, it takes a little more time to teach them what they want to look at. Showing them what the visual is going to be, when looking at the vertical and horizontal while using the stone most efficiently, is most important. You don’t want to buy an extra slab just because they want a little more blue in that backsplash. There are those customers wanting a show-stopper kitchen that do that, though. They’re looking for the wow factor, and we want to give that to them as much as possible.
Additionally, sometimes there are issues of fragility. Most of the stones we have that are fragile have been reinforced on the back at the factory. We’ll also rod when necessary, especially in the sink area, where extra support is needed.
Julie Hoffmeyer: When it comes to placement of the backsplash, we try to take into consideration the fragility of the stone we are working with. For instance, if there is a lot of quartz or mica in it and it is meshed on the back, we always take that into consideration when dealing with the lengths of it. We know, overall, how much leeway we have to work with on these materials.
The distance the splash has to travel is also a consideration. If we have a great distance to travel, we’re certainly not going to want to stretch it out there to a six foot piece that might break during transportation. We also even consider the construction of the home. For instance, in our neck of the woods, it’s not uncommon to see a log home.
We would hate to put a stretch of backsplash out there at six feet and have it teeter-tottering on the wall due to an uneven log. Or perhaps a random two-by-four that’s warped, and now we’ve got a recess in the wall for one reason or another that occurred during construction. So all of these things come into play.
We always try to place seams in the most inconspicuous places. Even when it comes to backsplash, no matter what the length, we try to put the fewest seams as we can. Typically, our backsplashes average 3 to 4 feet, based on how much we have to work within each slab.
The first thing we take out of a slab is, of course, the kitchen counters. We’ll then try to match up the backsplash to it. If we’ve got a stretch of backsplash that we’ve got to bring out to 5 feet and we feel like the material can handle it, we’ll certainly do it. We have honestly never rodded a backsplash before — we have never done that! We also, whenever possible, waterfall the backsplashes.
If we have a patterned granite my husband also tries to make it flow, so that when it comes to that 90 degree corner, it’s not going to be as noticeable. Some shops won’t do this because they want to get as much square feet out of that slab as possible. Our goal is always the best results for the homeowner. So when it comes to the backsplash, it is individual to the product, to the wall, to the construction we are adhering it to, and to the customer.
Kelly Milligan: If you ask somebody how many seams they’ll accept, the answer is zero, every time. But then again, the discussion is different if we are talking to them about a 5 inch piece of engineered stone versus something exotic that has mesh backing. So it depends on what the project is. If it’s a kitchen that requires full height backsplashes, we always want to look at their designs. If they’ve got 4 inch splashes and there are electrical outlets close to the countertops, we are going to have a totally different conversation. We’ve found a lot of these lately, and found that we have to do a larger splash, such as 5 or 6 inches high, because they don’t want to raise the outlets up. It’s almost impossible to safely make an outlet cutout in a 4 inch splash.
Another consideration: if they are going to reuse an existing tile backsplash installed above their old kitchen counters, we ask that they allow us to make our splash a little bit taller to reach the bottom of that tile. Our granite most of the time is not as thick or as straight as their old countertop. We’ve been recommending this approach a lot lately.
As far as the number of seams, we are not as concerned about that as we are about the length of each backsplash. If it’s engineered stone, then we can make it 70 or 80 inches long. But if it’s granite, specifically one of the more exotic granites, then we’ll start to shorten the length within reason. If we have material that we’d normally make only 60 inches but the kitchen requires 65 inches, we’re going to fudge and do that. Obviously, the taller the splash, the shorter the length, the less likely it is to break. Additionally, we always try and find out what areas are going to be seen from the living room, where is everyone going to be sitting and where is the most traffic going to be. We definitely want to find out where the focal points are.
I decided a long time ago, that instead of me just setting down rules and making everybody live by them, that we try to involve the customer in it and let them have some responsibility in the decision making. If they absolutely insist that a splash has to be longer than what we’re comfortable with, especially if it’s going to have outlets in it, that they become responsible if it breaks. If there is no more material, then there is no material, but if there is more material and if we have to remake it (and they’ve agreed to this upfront), they will pay for it. Moreover, we get to make it the size we originally wanted to, because we’ve just proved that is wasn’t strong enough. You wouldn’t believe how many times that changes people’s opinion of what they want. We’re not mean about it, we’re not pushing it down anybody’s throat. We’re just letting them have some responsibility and saying to them, that if you’re willing to take the financial risk to make this splash longer, we are willing to try just as long as you understand that you are going to pay for it. More often than not, when we have that discussion, they will change their mind on what they’re willing to accept.
Granted, seam placement is important, but it’s only part of the equation. My strategy has always been don’t ask them — tell them — then listen, but first, before they arrive, know what’s important to them.
Knowing what your client wants before they do is power, and having the confidence to use that power will get you where you want to go. They will sense it almost immediately, and trust me on this, when they do, their doubts will melt away, be grateful for your experience, and gush with thanks for relieving them of layout stress.
So have a plan and explain it as vividly and comprehensibly as possible, then listen. If they have their doubts, stand back and let them experiment with their ideas. If it looks good, works and they’re happy, go with it. If it doesn’t, explain to them that their way doesn’t allow for that matched seam, that cascade, or address that important focal point. Chances are they’ll see it your way, realize you had their best interest from the very beginning and go back to your original plan.
Additional information on best practices for backsplashes and seams can be found within the Marble Institute of America’s Stone Design Manual.
Thank you Jim, Julie and Kelly!