Grinder Maintenance for Stone Shops
Jennifer Holder
Special Correspondent
Hover over photos to read caption
 If you’ve spent any time using hand tools, you should know that replacing the carbon brushes in your electric power tools is important.
 According to Chris Metcalf of Flex North America, “The carbon brushes are like an oil change in your car where you’re replacing the oil every 3,000 miles. Same concept goes for carbon brushes in power tools.”
In other words, replacing the carbon brushes not only protects the life of your tool, it also makes your tool work more efficiently.
 The carbon brushes are the main components to making your tool run correctly. First of all, there are two carbon brushes in your tool, which means they should be replaced at the same time.
One is positive and one is negative. When the carbon brushes are working correctly, they conduct electricity to the armature and field coil, which then turns like a magnet in the unit, causing the spindle to turn.
 And not replacing your carbon brush, like not changing your oil, has serious consequences.
Some tools will actually shut off completely when it’s time to replace your brushes. Some will cause sparking inside the motor housing or bad smells.
It’s also important to periodically clean where your carbon brushes go, because at times your tool won’t work properly due to dust particles lodged inside the tool cover.
Sometimes, the copper wire is damaged inside the carbon brush, so it’s important to check that part of the carbon brush for damage of wear when you do periodic cleaning.
Tip: Bear in mind that using compressed air might not be the best way to dislodge dust particles. Sometimes the air can drive the particles further into the tool or clog up another part of the tool. You should wear a respirator anytime you are cleaning out a dusty tool.
Luckily, replacing the carbon brushes is easy. “It’s something you need to take the time to learn how to do and once you know how to do it, it’s an easy process,” says Metcalf.
Below is a basic guide to changing the carbon brushes on most tools. This isn’t true for all tools, however. You’ll need to check with the manufacturer to make sure you do it correctly.
Now, before you get started, make sure your electric power tool is free from its power source. In other words, make sure it’s unplugged!
How to Replace Carbon Brushes
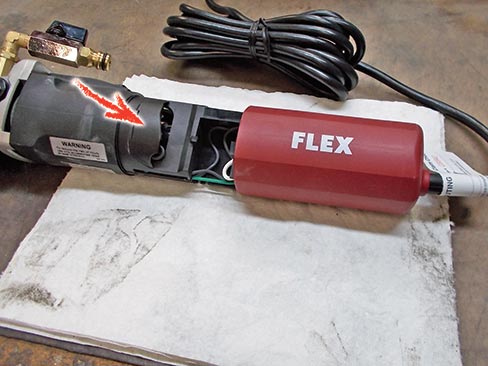
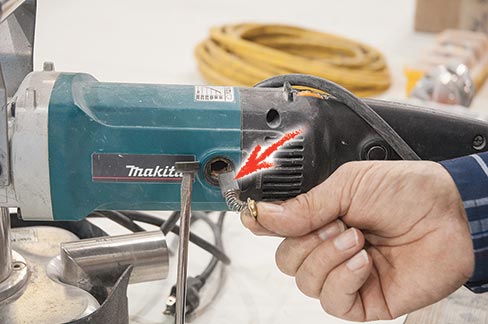
- Locate the carbon brushes for your particular tool and take off the cover. They might be located under the tool or under the “bolts” or caps at the end of the motor housing.
- Brush away any dust or particles from the brush cover, vacuum up any loose particles, and then unscrew it with a screwdriver or coin.
- Be careful when you open the cover to the carbon brushes, because most are spring-loaded and will pop out at you – parts could go flying!
- Pull out the brush and vacuum or clean the area to remove any particles that might have come out of the old brush, then slip the new one in. The housing where the brushes seat should be free of dust and grit.
- Tighten the cap back into place and repeat the same steps on the other side of the tool.
- Plug the tool back into the wall and test it.
Now, if your carbon brush is located somewhere else, not all of these steps might apply. Be sure to refer to your manufacturer’s website for the service diagram or technical service diagram. This will show you specifically where the carbon brush is located.
Also, it’s important to always purchase your carbon brushes directly from the manufacturer and use the ones specifically designed for your power tool. “A lot of the carbon brushes can be different densities so some can be soft and some can be hard,” says Metcalf. “They’re designed that way specifically for that tool.”